An affordable Kilimanjaro photo tour from Arusha with a gate visit typically involves a 5 to 8-day trek on a budget-friendly route like Marangu or Machame, focusing on capturing the mountain’s diverse landscapes. Expect costs to range from $1,500 to $2,500 per person for standard packages in 2026-2027, covering essential services, park fees, and guide support, with the gate visit being a standard part of the trekking process to begin your ascent.
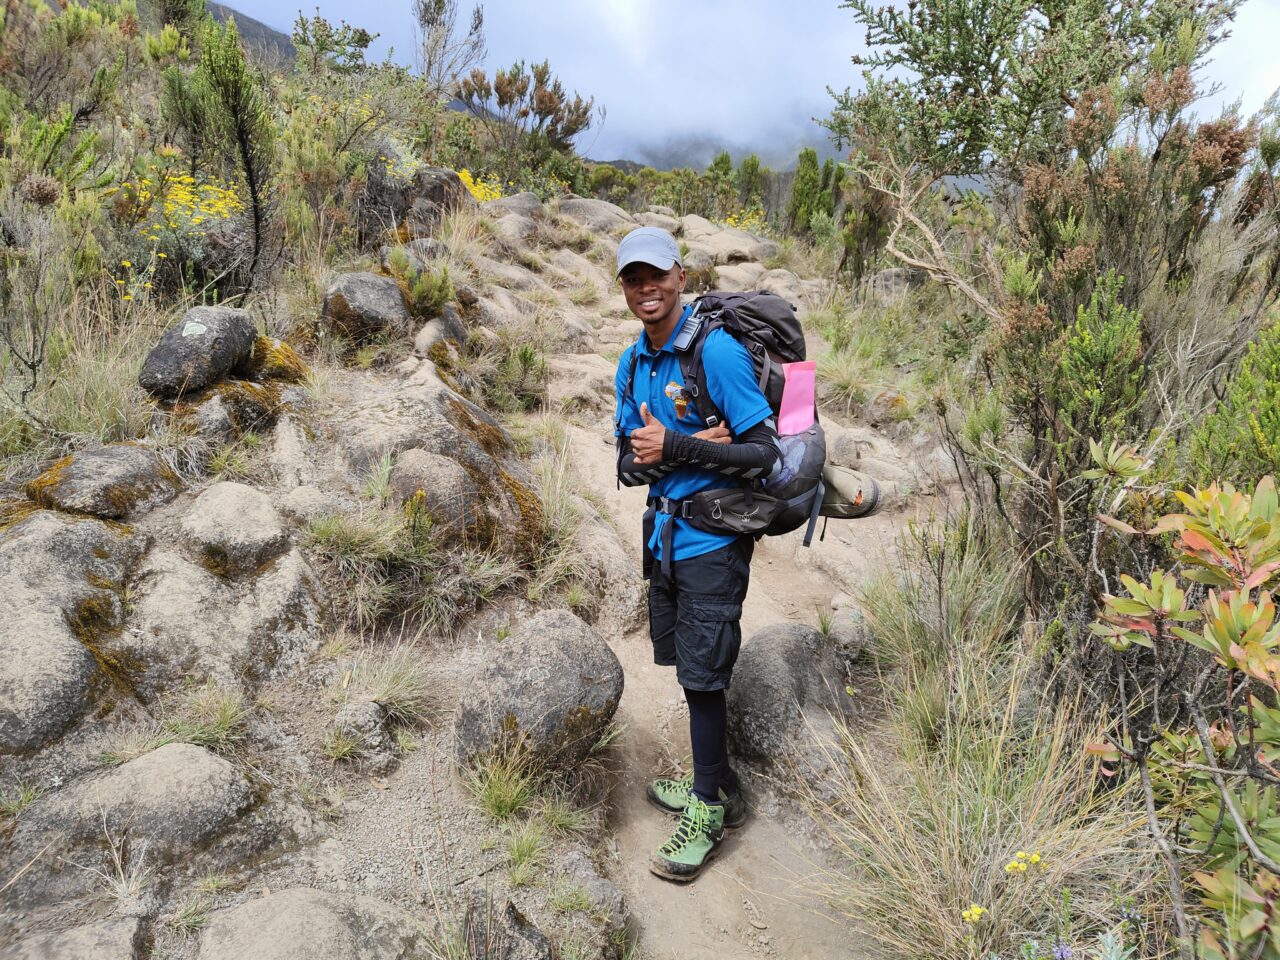
Planning Your Affordable Kilimanjaro Photo Tour From Arusha: Gate Visit Essentials
Kilimanjaro, the ‘Roof of Africa,’ is a dream destination for photographers seeking dramatic landscapes, unique flora and fauna, and the sheer majesty of Africa’s highest peak. For many, the journey begins in Arusha, the vibrant gateway city to Tanzania’s northern safari circuit and Kilimanjaro National Park. When planning an affordable Kilimanjaro photo tour from Arusha with a gate visit, it’s crucial to understand what ‘affordable’ means in this context and how the gate visit fits into the overall experience. This isn’t just about reaching the summit; it’s about documenting the journey, from the lush rainforests at the base to the stark, ethereal beauty of the alpine desert and arctic summit zone.
The concept of an ‘affordable’ tour often implies a balance between cost-effectiveness and essential quality. For Kilimanjaro, this means prioritizing safety, experienced guides, adequate food, and proper equipment, while potentially opting for shorter routes, group departures, or slightly less inclusive packages. The ‘gate visit’ is not an optional add-on but a fundamental part of any Kilimanjaro trek. It’s where you officially enter the national park, complete registration, meet your guides, and often, begin your hike. For photographers, this initial interaction with the mountain’s lower slopes offers the first opportunities for unique shots.
As we look towards 2026-2027, planning ahead is key. The demand for Kilimanjaro climbs remains high, and booking in advance, especially for budget-conscious travelers, can secure better rates and availability. This guide will navigate you through selecting the right tour, understanding costs, essential photography gear, and making the most of your photographic expedition from Arusha.
Understanding ‘Affordable’ for Kilimanjaro Photo Tours
The term ‘affordable’ when applied to Kilimanjaro trekking can be subjective, but in the context of a photo tour, it generally refers to tours that provide a high standard of safety and operational quality without the premium price tag associated with luxury expeditions. For 2026-2027, you can expect:
- Price Range: Typically between $1,500 and $2,500 per person for a standard 6-7 day trek. This price point usually covers park entry fees, camping/hut fees, rescue fees, meals, purified water, tents, cooking equipment, porters, guides, and a cook.
- Inclusions: Look for tours that clearly state what’s included. Essential inclusions for a photographic trip are reliable guides, sufficient porters to carry your gear (allowing you to focus on photography), and clear communication channels.
- Exclusions: Be aware of common exclusions such as flights, visa fees, travel insurance (mandatory for Kilimanjaro), personal gear rental (sleeping bags, warm clothing), tips for guides and porters, and personal expenses. For photographers, specific gear like portable chargers or extra battery storage might also be a personal cost.
- Route Choice: Shorter routes like the Marangu (5-day option) or Machame (6-day option) are often more budget-friendly due to fewer days and associated park fees. While shorter, these routes can still offer incredible photographic opportunities, especially if you choose a reputable operator that manages acclimatization well.
- Group vs. Private: Joining a group departure is almost always more affordable than a private climb. This is an excellent way to reduce costs for your affordable Kilimanjaro photo tour from Arusha.
When comparing prices for 2026-2027, ensure you’re comparing like-for-like. A significantly cheaper tour might cut corners on guide experience, food quality, or porter welfare, which can compromise safety and enjoyment. Always read reviews and check operator credentials.
The Crucial Gate Visit: Your Kilimanjaro Entry Point
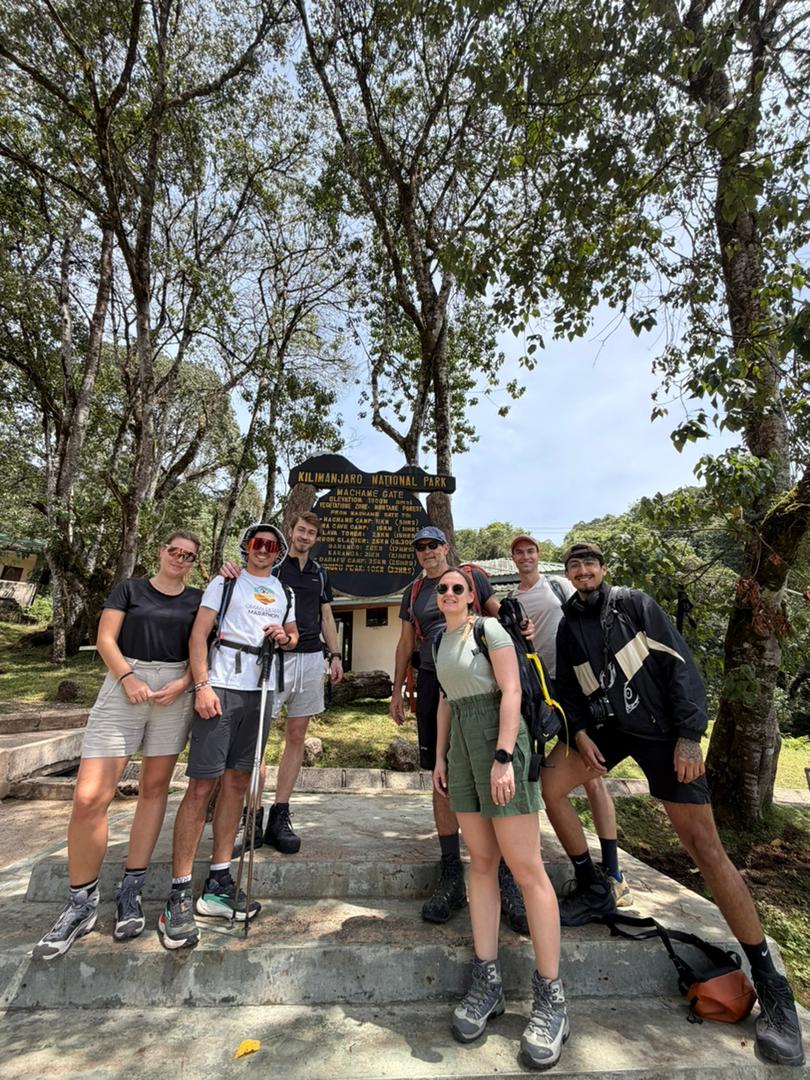
The ‘gate visit’ for a Kilimanjaro climb is a non-negotiable, integral part of the trekking experience. It’s the official point of entry into Kilimanjaro National Park. Whether your tour starts from Arusha or Moshi, your operator will arrange transport to one of the park’s main gates, depending on your chosen route:
- Marangu Gate (1,860m / 6,100ft): For the Marangu Route (Coca-Cola Route). This is the only route with hut accommodation.
- Machame Gate (1,800m / 5,905ft): For the Machame Route.
- Lemosho Gate (2,100m / 6,890ft): For the Lemosho Route.
- Shira Gate (3,600m / 11,811ft): For the Shira Route.
- Rongai Gate (1,750m / 5,741ft): For the Rongai Route.
- Mweka Gate (1,640m / 5,380ft): Primarily used for descent on several routes, but sometimes the starting point for very short treks.
What happens at the gate?
- Registration: Your guide will handle the park registration process, including signing in and paying the necessary park fees. These fees are substantial and form a large part of the tour cost.
- Briefing: Guides often provide a final briefing on the day’s trek, weather conditions, and any specific instructions.
- Meeting Staff: You might meet some of your support crew here, especially if they are joining you from the local area.
- Start of Trek: For most routes, the actual trekking begins immediately after leaving the gate, often through dense rainforest.
For photographers, the gate area itself and the initial rainforest section offer excellent opportunities. The vibrant green foliage, unique birdlife, and the first glimpses of Kilimanjaro through the canopy can make for compelling initial shots. An affordable Kilimanjaro photo tour from Arusha ensures this entry point is handled smoothly, allowing you to focus on capturing these early moments.
Choosing the Right Route for Photography on a Budget (2026-2027)
Selecting the appropriate Kilimanjaro route is critical for both acclimatization and photographic potential, especially when aiming for an affordable experience. Shorter routes are cheaper but offer less time for acclimatization, increasing the risk of altitude sickness. Longer routes are more expensive but provide better acclimatization and more diverse scenery.
Here’s a look at popular routes and their suitability for photography on a budget, considering 2026-2027 travel:
Marangu Route (5-7 Days)
Pros for Photographers:
- Affordability: Often the cheapest due to its shorter duration and hut accommodation (eliminating tent rental costs for clients).
- Unique Scenery: Ascends and descends the same path, offering different perspectives. The rainforest and moorland zones are particularly rich in photographic subjects.
- Hut Accommodation: More comfortable than camping, allowing for better rest and gear management.
Cons for Photographers:
- Acclimatization: The 5-day option has a poor acclimatization profile, leading to higher failure rates. The 7-day option is better but still less ideal than longer routes.
- Crowding: Being the oldest and most popular route, it can be crowded, especially during peak seasons.
- Less Diverse Scenery: Ascending and descending the same path means you see less varied terrain compared to ‘point-to-point’ routes.
Budget Focus: Excellent for those prioritizing cost. The 7-day option is recommended for better success rates and photographic enjoyment.
Machame Route (6-7 Days)
Pros for Photographers:
- Scenery: Considered one of the most scenic routes, offering spectacular views of the Western Breach and Barranco Wall. The ‘trek, walk, climb’ profile aids acclimatization.
- Acclimatization: The 7-day version has an excellent acclimatization profile (‘climb high, sleep low’).
- Photography Potential: The diverse landscapes, including the Shira Plateau, Barranco Wall, and the final ascent to Stella Point, are incredibly photogenic.
Cons for Photographers:
- Cost: Slightly more expensive than Marangu due to being a camping route and often a day longer for optimal acclimatization.
- Crowding: Can be busy, especially the 6-day option.
Budget Focus: A strong contender for an affordable Kilimanjaro photo tour from Arusha if you opt for the 6-day version or join a group. The 7-day option offers superior acclimatization and photography but at a slightly higher cost.
Rongai Route (6-7 Days)
Pros for Photographers:
- Scenery: Approaches Kilimanjaro from the north, offering different views and often more wildlife sightings (monkeys, antelopes) in the drier northern slopes.
- Less Crowded: Generally less crowded than Marangu and Machame, providing a more intimate photographic experience.
- Acclimatization: The 7-day option offers good acclimatization.
Cons for Photographers:
- Rainforest Difficulty: The initial approach can be drier and less lush than other routes, though the upper zones are equally stunning.
- Cost: Similar to Machame, it’s a camping route and usually requires 6-7 days.
Budget Focus: A good option for those seeking fewer crowds and a slightly different perspective. The 7-day Rongai is a solid choice for budget-conscious photographers valuing a less congested experience.
For 2026-2027, if your primary goal is affordability and you’re willing to accept slightly higher risks or less ideal acclimatization, the 5-day Marangu is an option. However, for a significantly better balance of cost, success rate, and photographic enjoyment, the 6-day Machame or 7-day Marangu/Rongai routes are highly recommended. The gate visit is standard for all these routes.
Essential Photography Gear for Your Kilimanjaro Expedition
Packing the right gear is crucial for an affordable Kilimanjaro photo tour from Arusha. You want to capture the incredible journey without being weighed down or unprepared for the harsh conditions. Remember, your porters will carry the bulk of your gear, but you’ll carry your daypack with essentials, including your camera.
Camera & Lenses
- Main Camera Body: A durable DSLR or mirrorless camera is ideal. Consider weather-sealing if possible.
- Lenses: A versatile zoom lens (e.g., 24-70mm or 18-135mm) is essential for capturing a range of scenes, from landscapes to close-ups. A wide-angle lens (e.g., 14-24mm or 16-35mm) is excellent for dramatic landscapes and the vast summit views. A telephoto lens (e.g., 70-200mm) can be useful for wildlife or compressing distant mountain features, but might be too heavy for some.
- Backup Camera: Consider a small, lightweight backup camera or even just your smartphone for moments when your main camera is inaccessible or for quick shots.
Power & Storage
- Extra Batteries: Cold temperatures drain batteries quickly. Bring at least 2-3 fully charged spare batteries.
- Power Bank: A high-capacity power bank is essential for recharging your camera, phone, and other devices, especially on camping routes. Consider one with a built-in flashlight.
- Memory Cards: Bring plenty of high-speed memory cards (SD cards, CF cards, etc.) – more than you think you’ll need.
- Chargers: Ensure you have the correct chargers for all your devices.
Protection & Accessories
- Camera Bag/Backpack: A comfortable, weather-resistant daypack (around 30-40 liters) is essential for carrying your camera, extra lenses, batteries, water, snacks, and rain gear. Ensure it has good padding and adjustable straps.
- Rain Cover: A waterproof cover for your camera bag is a must.
- Lens Cleaning Kit: Microfiber cloths, lens cleaning solution, and a rocket blower to keep your lenses free from dust and moisture.
- Tripod: A lightweight, sturdy travel tripod can be invaluable for low-light conditions (sunrise/sunset) and capturing sharp landscapes, but adds weight.
- Camera Gloves: Specialized photography gloves allow you to operate your camera in extreme cold while keeping your hands warm.
- Silica Gel Packs: Place these in your camera bag to absorb moisture, especially when descending into humid lower altitudes.
Pro Tip: Test all your gear extensively before your trip. Familiarize yourself with your camera settings, especially for low light and high altitude conditions. Keep your camera and batteries in an inner pocket of your jacket during the day to maintain warmth.
Budgeting for Your Kilimanjaro Photo Tour: Costs and Considerations for 2026-2027
Understanding the cost breakdown is vital for planning an affordable Kilimanjaro photo tour from Arusha. While tour operators bundle many costs, knowing the components helps you appreciate the value and identify potential savings.
Typical Cost Breakdown (per person, 6-7 day trek)
- Park Fees: Approximately $70-$80 per day ($50 for park entry, $10 for camping, $10 for conservation fee). This is a significant portion and non-negotiable.
- Rescue Fees: Around $20-$30.
- Guide & Porter Wages: Varies based on team size and days, but budget around $200-$300 per climber for the entire crew’s wages.
- Food & Cooking Equipment: Included in the tour package, typically valued at $150-$250.
- Tents & Camping Gear: For camping routes, this is part of the package.
- Transport: From Arusha to the gate and back, usually around $50-$100.
- Operator’s Margin/Overhead: This covers logistics, office staff, marketing, insurance, and profit.
Total Estimated Tour Cost: $1,500 – $2,500 for a reputable, affordable operator in 2026-2027.
Additional Costs to Factor In:
- Flights: To/from Kilimanjaro International Airport (JRO).
- Visa: For Tanzania.
- Travel Insurance: Mandatory, covering high-altitude trekking and medical evacuation.
- Vaccinations & Medications: Consult your doctor.
- Personal Gear: Rental or purchase of warm clothing, sleeping bags, etc.
- Tips: For guides, porters, and cooks. This is customary and significant, often totaling $200-$300 per climber.
- Personal Expenses: Souvenirs, extra snacks, bottled water (if preferred over purified), etc.
- Pre/Post-Trek Accommodation: In Arusha or Moshi.
- Optional Photography Gear: Extra batteries, power banks, specialized equipment.
Saving Tips for 2026-2027:
- Travel in the Shoulder Seasons: January-March and June-October offer good weather and potentially lower prices than peak months (July-September, December).
- Join a Group Departure: Share costs with other trekkers. Check for group departures on sites like Top Guide Adventures’ group tours.
- Book in Advance: Especially for 2026-2027, early booking can sometimes secure better rates and ensure availability.
- Choose a Reputable Local Operator: Local operators often offer better value and directly support the Tanzanian economy. Top Guide Adventures is a well-regarded local operator.
The Photographic Journey: From Arusha Gate to Summit
An affordable Kilimanjaro photo tour from Arusha is about capturing the entire ascent, not just the peak. Each day presents unique visual opportunities.
Day 1: The Rainforest Gateway
After your gate visit, the trek begins through dense, vibrant rainforest. This is a world teeming with life. Look for:
- Lush Vegetation: Giant ferns, moss-covered trees, and endemic plants.
- Wildlife: Colobus monkeys, blue monkeys, various bird species (turacos, hornbills).
- Light: Dappled sunlight filtering through the canopy creates dramatic lighting.
- Atmosphere: The misty, humid environment adds a mystical quality.
Photography Tip: Use a wider aperture (lower f-number) to isolate subjects like birds or flowers against the busy background. A polarizing filter can help manage reflections and enhance the green tones.
Day 2: Transition to Moorland
As you ascend, the rainforest gives way to moorland. The landscape opens up, revealing:
- Giant Heathers and Groundsels: Unique flora adapted to higher altitudes.
- Expansive Views: Glimpses of the plains below and the changing shape of the mountain ahead.
- Erosion Patterns: Textural details on the landscape.
Photography Tip: Use a mid-range zoom to capture both the sweeping vistas and the details of the unique plant life. Look for interesting cloud formations.
Day 3: Alpine Desert and Glacial Views
The terrain becomes increasingly rocky and arid, resembling a lunar landscape. You’ll start seeing the first glaciers:
- Volcanic Rock Formations: Striking textures and colors.
- Stark Beauty: The minimalist, high-altitude desert environment.
- Glacier Views: Early views of the iconic Kilimanjaro glaciers, which are sadly receding. Capture them while you can.
- Sunsets/Sunrises: Often spectacular from these higher camps.
Photography Tip: Use a tripod for sharper images in fading light. Bracket your exposures for high-contrast scenes (bright sky, dark rocks).
Day 4: The Summit Push (Uhuru Peak)
This is the most challenging day, typically starting around midnight.
- Stars and Milky Way: If you start early enough, the night sky above the clouds can be impressive.
- Pre-Dawn Light: The first light hitting the crater rim is magical.
- Summit Views: The view from Uhuru Peak (5,895m / 19,341ft) at sunrise, often above the clouds, is unparalleled.
- Glacier Art: The ice formations and crevasses are unique and photogenic.
- The Sign: The iconic ‘Uhuru Peak’ sign.
Photography Tip: Keep your camera warm! Use a headlamp for navigating and a simple point-and-shoot or smartphone for quick summit shots to conserve battery on your main camera. Focus on capturing the feeling of accomplishment and the vastness of the view.
Day 5-7: Descent and Reflection
The descent offers a different perspective on the landscapes you traversed. It’s faster but requires careful footing. Look for:
- Different Light: Midday sun can highlight different features than morning or evening light.
- Revisiting Scenes: See familiar areas in a new light.
- Team Spirit: Capture moments of camaraderie with your guides and porters.
Photography Tip: Take advantage of the faster pace to capture candid shots of your group and the mountain’s grandeur from new angles.
An affordable Kilimanjaro photo tour from Arusha ensures you have the support to focus on these photographic opportunities throughout your entire climb.
Choosing a Reputable Operator for Your Photo Tour (2026-2027)
Selecting the right tour operator is paramount, especially when looking for an affordable Kilimanjaro photo tour from Arusha. While price is a factor, prioritizing safety, ethical treatment of staff, and a good success rate should be your main concerns. For 2026-2027, consider these points:
- Experience & Reputation: Look for operators with a long track record and positive reviews on platforms like TripAdvisor. Top Guide Adventures has a strong reputation.
- Safety Standards: Do they carry sufficient oxygen, have certified guides trained in first aid, and have clear emergency evacuation plans?
- Porter Welfare: Ethical treatment of porters is crucial. Do they provide adequate food, shelter, and fair wages? Look for operators that are members of organizations like the Kilimanjaro Porters Assistance Project (KPAP).
- Group Size: Smaller group sizes (ideally under 12) can mean more personalized attention and less environmental impact.
- Inclusions & Exclusions: A clear, detailed list prevents surprises. Ensure park fees, rescue fees, and meals are included.
- Communication: Is the operator responsive to your queries? Do they have clear contact channels like WhatsApp or email?
For an affordable Kilimanjaro photo tour from Arusha in 2026-2027, partnering with a local operator like Top Guide Adventures can offer excellent value. They understand the mountain intimately, employ local guides and porters, and are often more flexible with custom requests, including those specific to photographers.
Photography Tips for High Altitude and Challenging Conditions
Kilimanjaro presents unique photographic challenges due to altitude, temperature fluctuations, and varying light conditions. Here are some tips to help you capture stunning images:
- Manage Battery Life: Cold drains batteries rapidly. Keep spares in an inside pocket close to your body. Turn off image stabilization or other power-hungry features when not needed. Use airplane mode on your phone to save battery.
- Protect Your Gear: Use a waterproof camera bag and rain cover. Keep your camera protected from dust and moisture, especially during descents. Consider silica gel packs in your bag.
- Shoot in RAW: This format offers the most flexibility for editing, allowing you to recover details in highlights and shadows, crucial for high-contrast scenes.
- White Balance: Auto white balance can struggle in changing light. Experiment with presets (daylight, cloudy) or set it manually.
- Focus on Light: The light on Kilimanjaro is dramatic. The golden hours (sunrise and sunset) are prime times. The harsh midday sun can be challenging, so look for subjects with interesting shadows or use a diffuser/reflector if you have one.
- Capture the Scale: Use foreground elements (rocks, plants, people) to give a sense of scale to the vast landscapes and the immense mountain.
- Tell a Story: Beyond landscapes, photograph the journey – the challenging paths, the camaraderie, the unique flora and fauna, the expressions of determination and joy.
- Composition: Use the rule of thirds, leading lines (trails, ridges), and symmetry to create compelling images. Look for patterns and textures.
- Practice on the Go: Use your smartphone for quick shots or to practice composition when your main camera is packed away.
- Don’t Forget the Summit: While challenging, try to capture the feeling of reaching Uhuru Peak. The iconic sign, the glaciers, and the expansive views are special shots.
Remember, your affordable Kilimanjaro photo tour from Arusha is an adventure. Sometimes the best photos come from unexpected moments, so stay observant and ready.
Preparing for Your Kilimanjaro Photo Tour: A Checklist
Proper preparation is key to a successful and enjoyable affordable Kilimanjaro photo tour from Arusha. Here’s a checklist to help you get ready for 2026-2027:
Pre-Trip Planning
- Book Your Tour: Choose a reputable operator and book well in advance for 2026-2027.
- Flights: Book flights to Kilimanjaro International Airport (JRO).
- Visa: Obtain your Tanzanian visa.
- Travel Insurance: Ensure it covers high-altitude trekking and emergency evacuation.
- Medical Check-up: Consult your doctor regarding vaccinations, altitude sickness medication (e.g., Diamox), and general fitness.
- Fitness Training: Focus on cardiovascular fitness and leg strength. Hiking with a weighted backpack is highly recommended.
- Photography Gear: Test all equipment, charge batteries, clear memory cards, and pack appropriately.
Essential Clothing (Layering System)
- Base Layers: Moisture-wicking thermal tops and bottoms (merino wool or synthetic).
- Mid Layers: Fleece jacket or lightweight down jacket for insulation.
- Outer Layer: Waterproof and windproof jacket and trousers (Gore-Tex or similar).
- Insulation Layer: A warm, puffy down or synthetic jacket for evenings and summit night.
- Headwear: Warm beanie, sun hat, balaclava or neck gaiter.
- Gloves: Thin liner gloves and warm, waterproof outer gloves/mittens.
- Footwear: Broken-in hiking boots, camp shoes/sandals, and comfortable socks (wool or synthetic).
Trekking & Camping Gear
- Backpack: 40-60 liter backpack for your personal gear (porters carry the rest).
- Sleeping Bag: Rated for -10°C to -20°C (0°F to -4°F).
- Sleeping Pad: For added comfort and insulation (if not provided).
- Trekking Poles: Highly recommended for stability and reducing knee strain.
- Headlamp: With extra batteries.
- Water Bottles/Hydration Reservoir: At least 2-3 liters capacity.
- Water Purification: Tablets or filter (though operators usually provide boiled/purified water).
- Sun Protection: High SPF sunscreen, lip balm with SPF, sunglasses.
- First-Aid Kit: Personal medications, blister treatment, pain relievers, antiseptic wipes.
- Toiletries: Biodegradable soap, toothbrush, toothpaste, wet wipes, hand sanitizer.
Photography Gear Checklist (Recap): Camera, lenses, extra batteries, power bank, memory cards, charger, camera bag/daypack, rain cover, lens cleaning kit.
By preparing thoroughly, you’ll be well-equipped to fully enjoy and document your affordable Kilimanjaro photo tour from Arusha, making the most of every moment from the initial gate visit to the summit and back.
Making the Most of Your Arusha Base
Arusha serves as the crucial starting and ending point for your Kilimanjaro adventure. It’s a bustling city with a unique charm, offering opportunities to prepare, relax, and reflect.
- Gear Check & Purchase: Before your trek, Arusha has shops where you can purchase or rent last-minute items. However, it’s best to bring essential photography gear from home.
- Pre-Trek Briefing: Most operators, including Top Guide Adventures, will arrange a pre-trek briefing in Arusha. This is your chance to meet your guides, finalize details, and ask any last-minute questions about the trek or your affordable Kilimanjaro photo tour from Arusha.
- Acclimatization (Optional): Some travelers opt to spend an extra day or two in Arusha or nearby areas to acclimatize slightly before heading to the mountain gates.
- Post-Trek Celebration: After descending Kilimanjaro, Arusha is the place to relax, enjoy good food, and share your incredible photos and stories. Many operators arrange celebratory dinners.
- Local Culture: Explore local markets, visit the Arusha Declaration Museum, or enjoy the local Tanzanian cuisine. These experiences can also provide unique photographic subjects.
Ensure your operator provides reliable airport transfers and accommodation in Arusha if needed, which is standard for most packages targeting travelers for 2026-2027.
Conclusion: Your Affordable Kilimanjaro Photo Adventure Awaits
An affordable Kilimanjaro photo tour from Arusha with a gate visit is an achievable and incredibly rewarding experience for photographers of all levels. By carefully selecting your route, packing smart, understanding the costs, and choosing a reputable operator, you can capture the magic of Africa’s highest peak without breaking the bank.
Remember that ‘affordable’ doesn’t mean compromising on safety or quality. Prioritize operators who treat their staff well and have a strong safety record. The memories and photographs you capture on Kilimanjaro will be treasured for a lifetime. Planning for 2026-2027 allows you to secure the best options and prepare thoroughly for this epic journey.
Ready to plan your photographic expedition? Contact Top Guide Adventures to discuss your affordable Kilimanjaro photo tour from Arusha. Reach out via WhatsApp at +255616946642, email topguideadventures@gmail.com, or info@topguideadventures.com for a personalized quote and itinerary.
Check Availability for Affordable Kilimanjaro Photo Tour From Arusha: Gate Visit & Full Itinerary
Ready to compare dates, prices, and the best option for your group? Send the package name and travel month so the team can reply with a clear quote, availability, and what is included.
Kilimanjaro Airport Vs Arusha For Climbers: The Definitive Guide 2026-2027
A comprehensive comparison of Kilimanjaro International Airport (JRO) and Arusha Airport (ARK) for trekkers planning a Mount Kilimanjaro climb, detailing pros, cons, and booking advice for...
View package details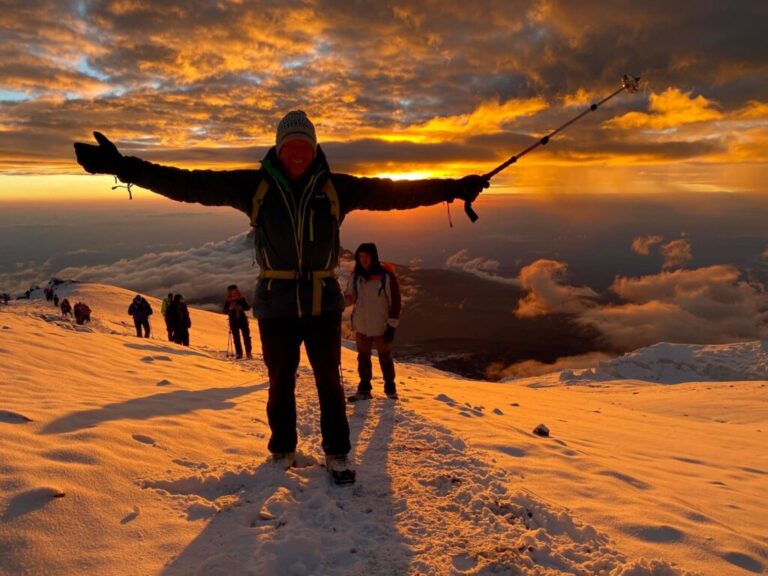
Kilimanjaro Climb With Professional Photography Support In | Top Guide
Elevate your Kilimanjaro ascent by including professional photography services. Top Guide Adventures ensures your most challenging and rewarding moments on Africa's highest peak are...
View package details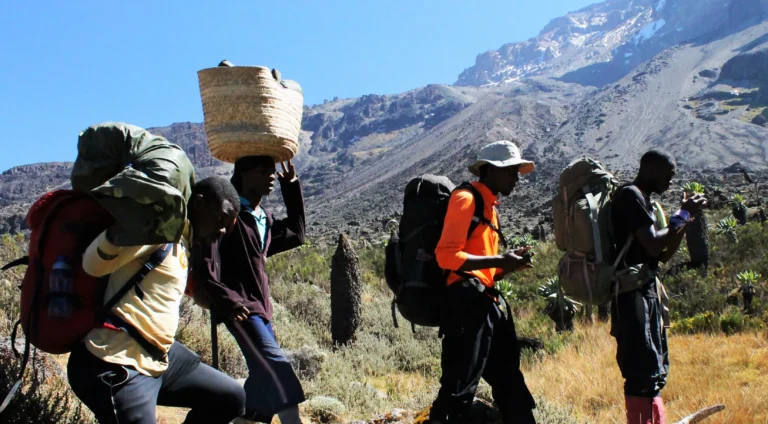
Kilimanjaro Photography Mistakes At High Altitude 2026-2027
Kilimanjaro Photography Mistakes at High Altitude is explained with current 2026-2027 planning, price, itinerary and booking information.
View package details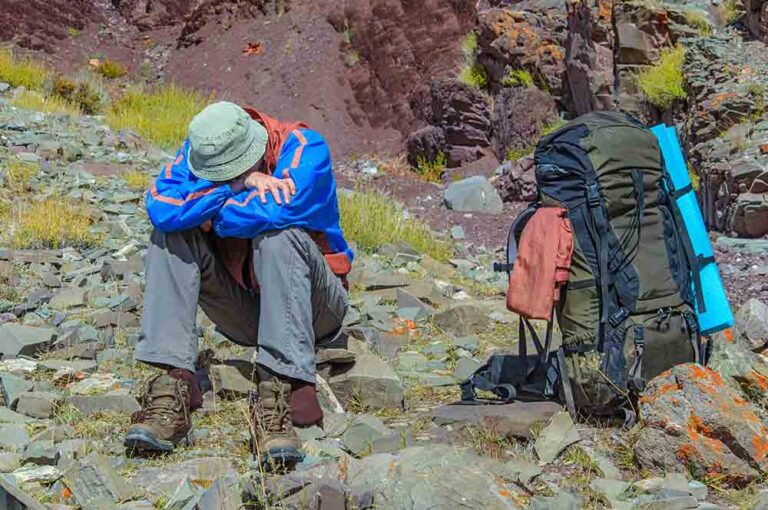
Kilimanjaro Airport Transfer For Large Groups: Smooth Travel With Top Guide
Top Guide Adventures specializes in Kilimanjaro Airport transfers for large groups, ensuring a smooth and comfortable journey from Kilimanjaro International Airport (JRO) to your...
View package details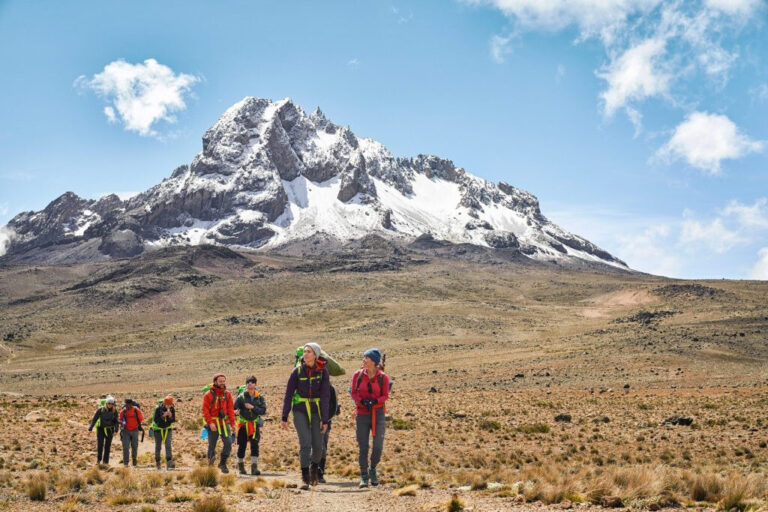
Best Month To Photograph Kilimanjaro 2026-2027
Best Month to Photograph Kilimanjaro is explained with current 2026-2027 planning, price, itinerary and booking information.
View package details
Kilimanjaro Early-Bird Climbing Discounts For Adventures 2026-2027
Plan your 2026-2027 Kilimanjaro climb and take advantage of early-bird discounts. Top Guide Adventures offers savings for those who book in advance, ensuring a memorable and affordable...
View package details
How To Identify An Unrealistically Cheap Kilimanjaro Package 2026-2027
How to Identify an Unrealistically Cheap Kilimanjaro Package is explained with current 2026-2027 planning, price, itinerary and booking information.
View package details
Kilimanjaro Low-Budget Booking Red Flags: Avoid Scams In 2026-2027
Climbing Kilimanjaro on a budget is possible, but requires vigilance. This guide highlights critical red flags to watch out for when booking a low-cost trek, ensuring your 2026-2027...
View package details
Kilimanjaro Standard Camp Vs Luxury Your Ultimate Comparison For Climbs
Choosing between standard and luxury camping on Kilimanjaro significantly impacts your trek experience. This guide breaks down the key differences in accommodation, meals, equipment, and...
View package details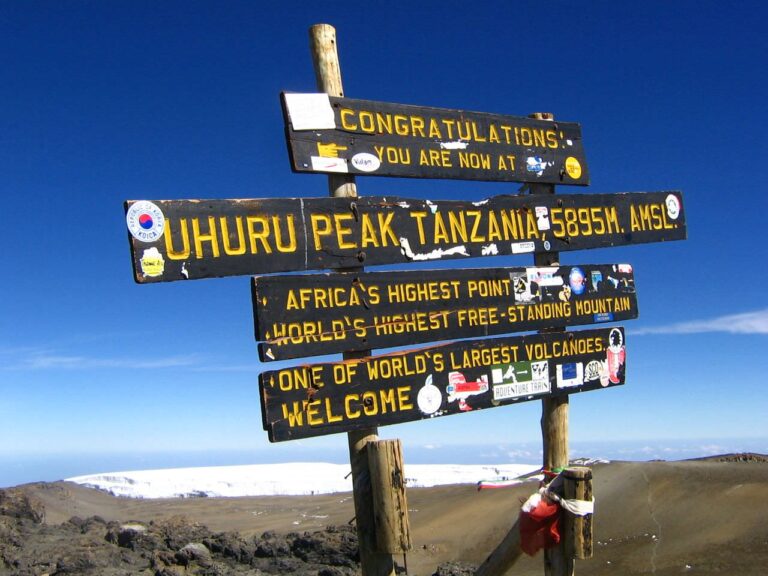
What Does Kilimanjaro Rainforest Look Like? A Trekkers Visual Guide 2026-2027
The Kilimanjaro rainforest is a vibrant, humid zone of dense vegetation, towering trees, and diverse plant life found on the mountain's lower slopes. It's the first major ecosystem trekkers...
View package details
Kilimanjaro Climb With A Personal Support Assistant: Your Ultimate Guide
Climbing Mount Kilimanjaro with a personal support assistant offers unparalleled safety, comfort, and focus on your summit goals. This guide details what a personal assistant entails, its...
View package detailsHow To Know Whether You Are Ready For Kilimanjaro: A Comprehensive Guide
Climbing Mount Kilimanjaro is a significant undertaking. This guide helps you evaluate your physical, mental, and logistical readiness to ensure a safe and successful trek in 2026 or 2027...
View package detailsNo related package matches those filters. Clear one or more filters to see the other topic-matched options.