The most common Kilimanjaro photography mistakes at high altitude involve underestimating the impact of cold, thin air, and reduced daylight on camera equipment and battery life, failing to protect gear from dust and moisture, not anticipating rapid weather changes, and neglecting to capture the human element of the climb alongside the grand landscapes. Avoiding these pitfalls is crucial for securing memorable, high-quality images from your 2026 or 2027 expedition.
Understanding the High-Altitude Photography Environment on Kilimanjaro
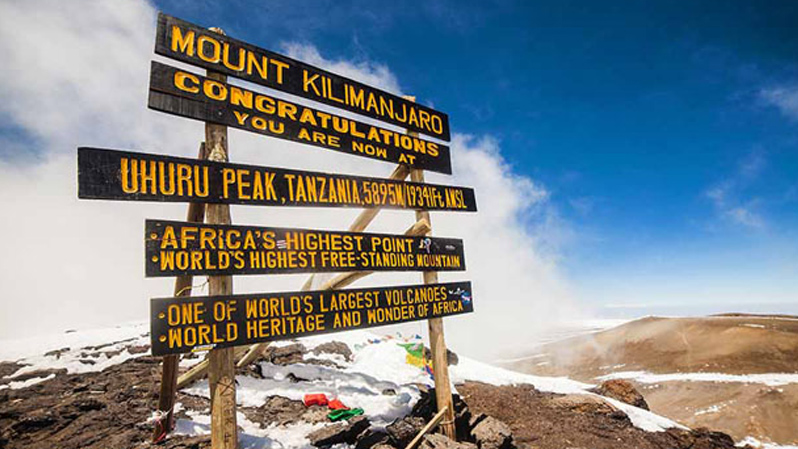
Kilimanjaro, Africa’s highest peak, offers unparalleled photographic opportunities, from lush rainforests at its base to the stark, icy alpine desert near the summit. However, the journey to the top, especially the final push through the alpine zone and to Uhuru Peak at 5,895 meters (19,341 feet), introduces a unique set of environmental factors that can significantly impact your photography. These high-altitude conditions are not just about the view; they are about the challenges they pose to your gear and your ability to capture the experience effectively. For anyone planning a Kilimanjaro climb in 2026 or 2027, understanding these specific environmental hurdles is the first step to avoiding common photography mistakes.
The air at these altitudes is approximately half as dense as at sea level, meaning less oxygen and a colder ambient temperature. This thin air also affects light conditions, making them appear different and requiring adjustments in exposure. Furthermore, the weather on Kilimanjaro is notoriously unpredictable. You can experience sunshine, rain, snow, and gale-force winds all within a single day. These elements, combined with the physical exertion of climbing, can turn a simple act like changing a lens into a complex operation. Being prepared for these conditions means more than just packing the right clothing; it means preparing your camera and your approach to photography.
The Impact of Altitude on Camera Gear and Performance
It’s a common misconception that cameras are immune to altitude. While they don’t suffer from ‘altitude sickness’ in the human sense, the physical properties of high altitude can indeed affect their performance. The primary culprit is the extreme cold. Temperatures on Kilimanjaro can plummet well below freezing, especially at night and during the summit push. Cold batteries lose their charge much faster than usual. A fully charged battery that might last an entire day at lower altitudes could drain in a matter of hours, or even minutes, at the summit. This is a critical factor for any photographer on Kilimanjaro, particularly during dawn and dusk photography sessions, or for those capturing the sunrise from Stella Point or Uhuru Peak.
Beyond battery life, extreme cold can also affect the mechanical and electronic components of your camera. LCD screens can become sluggish, and autofocus systems might struggle to lock onto subjects in freezing conditions. Condensation is another major enemy. When you bring a cold camera into a warm environment (like a tent), moisture can form on and inside the equipment, potentially causing short circuits or corrosion over time. This is why acclimatization and careful handling of your gear are paramount for Kilimanjaro photography.
Cold Temperatures: The Silent Killer of Batteries and Performance
The most frequent complaint from photographers on Kilimanjaro is the rapid depletion of battery power. This isn’t a fault of the camera; it’s physics. Lithium-ion batteries, the most common type used in digital cameras, perform poorly in cold. Their chemical reactions slow down, reducing their capacity and voltage. A battery that reads 100% charge might suddenly drop to 50% or less when exposed to freezing temperatures. This can be particularly frustrating when you’re aiming to capture the iconic sunrise over the clouds from the summit, a moment that often occurs in the coldest part of the day.
To combat this, photographers planning a climb in 2026 or 2027 should adopt a strategy of keeping batteries warm. This means storing spare batteries in an inside pocket close to your body, within your insulated clothing. When a battery is low, swap it with a warm spare and immediately put the depleted one into your warm pocket to “recharge” its thermal energy. Some photographers even use hand warmers placed inside their camera bag, though this is less effective than direct body heat. Investing in multiple spare batteries is non-negotiable for serious Kilimanjaro photography. Consider that a single battery might only yield a handful of shots in extreme cold, necessitating a constant rotation of spares.
Dust and Moisture: Unseen Threats to Your Lens and Sensor
Kilimanjaro’s trails, especially the drier routes like Lemosho or Shira, are often dusty. This fine volcanic dust gets everywhere. When you’re changing lenses, especially in windy conditions, dust can easily enter your camera body and settle on the sensor. This results in dark spots appearing on all your photos, requiring tedious post-processing or a professional sensor cleaning. Moisture, as mentioned, is also a significant threat, stemming from condensation, rain, or snow.
To mitigate dust, minimize lens changes. If you must change lenses, do so quickly and in a sheltered location, such as inside a large tent or a vehicle. Use a blower brush to remove loose dust from the lens and body before inserting a new lens. A sturdy, waterproof camera bag is essential for protecting your gear from rain and snow. Consider using a rain cover for your camera when shooting in inclement weather. For moisture control, allow your gear to acclimatize slowly when moving between vastly different temperature zones. For example, when returning to your tent from the cold outdoors, keep your camera inside your bag for a while before opening it, allowing condensation to form on the bag’s exterior rather than your equipment.
Common Kilimanjaro Photography Mistakes and How to Fix Them
Beyond the environmental challenges, many photographers make basic mistakes that detract from their Kilimanjaro experience and their photos. These are often a result of not planning adequately or understanding the unique demands of this high-altitude trek. Learning to avoid these common pitfalls can dramatically improve your photographic output and your overall enjoyment of the climb.
Mistake 1: Not Planning Your Gear for the Cold
As discussed, cold is a major issue. A common mistake is bringing a camera and lenses that are not suited for sub-zero temperatures, or failing to pack enough spare batteries. Many photographers rely on a single battery, which is a recipe for disaster at high altitudes.
The Fix:
- Multiple Spare Batteries: Pack at least 3-4 fully charged spare batteries for your camera and any other essential electronics (e.g., GPS, headlamp).
- Battery Pouches: Invest in insulated battery pouches or use small, zip-lock bags to store spare batteries, keeping them close to your body heat.
- Camera Hand Warmer: Consider a chemical hand warmer placed inside your camera bag, especially for longer shooting sessions in extreme cold.
- Lens Warmers: For professional setups, lens warmers can be a lifesaver, though often overkill for casual trekkers.
Mistake 2: Insufficient Protection Against Dust and Moisture
Leaving your camera exposed or not having a proper system for lens changes leads to dust-covered sensors and smudged lenses.
The Fix:
- Waterproof Camera Bag: Use a high-quality, waterproof or water-resistant camera bag.
- Rain Cover: A dedicated camera rain cover is invaluable for protection during wet weather.
- Dust Blower and Microfiber Cloths: Carry a rocket blower and several clean microfiber cloths. Use the blower to dislodge dust before wiping.
- Lens Hoods: Always use lens hoods. They protect the front element from impacts and also help shield the lens from rain and dust.
- Minimize Lens Changes: Stick to one versatile lens if possible (e.g., a zoom like 24-70mm or 24-105mm). If you need multiple lenses, plan changes carefully.
Mistake 3: Neglecting to Pack Essential Accessories
Photographers often focus on the camera body and lenses, forgetting crucial accessories that make shooting possible and easier at altitude.
The Fix:
- Tripod: A lightweight, sturdy tripod is essential for low-light conditions (dawn/dusk) and for capturing sharp landscapes. Ensure it has good locking mechanisms that won’t freeze.
- Remote Shutter Release/Timer: This minimizes camera shake, especially when using a tripod.
- Extra Memory Cards: Don’t run out of space. Bring more cards than you think you’ll need.
- Headlamp with Red Light Option: Essential for navigating and shooting in the dark without ruining night vision (yours or others’).
- Cleaning Kit: A comprehensive cleaning kit for lenses, sensors, and camera bodies.
Mistake 4: Over-Reliance on Auto Modes
While convenient, auto modes don’t always account for the dramatic lighting and challenging conditions on Kilimanjaro, leading to underexposed or overexposed shots, especially in snow or against bright skies.
The Fix:
- Understand Exposure Triangle: Familiarize yourself with Aperture, Shutter Speed, and ISO.
- Use Aperture Priority (Av/A) or Shutter Priority (Tv/S): These modes give you more control than full auto.
- Exposure Compensation: Learn to use exposure compensation (+/- button) to adjust for bright snow or dark shadows. Often, you’ll need to overexpose slightly (e.g., +0.7 to +1.3 EV) when shooting snow-covered scenes to prevent them from looking gray.
- Manual Mode (M): For critical shots, mastering manual mode allows for complete control.
- Shoot in RAW: RAW files capture more data, giving you greater flexibility in post-processing to correct exposure and white balance issues.
Mistake 5: Not Thinking About Composition and Subject Matter
It’s easy to get caught up in the grandeur and just point and shoot, or focus only on landscapes, forgetting the human story of the climb.
The Fix:
- Rule of Thirds: Compose your shots using the rule of thirds for more dynamic images.
- Foreground Interest: Include interesting foreground elements (rocks, ice, prayer flags) to add depth to your landscapes.
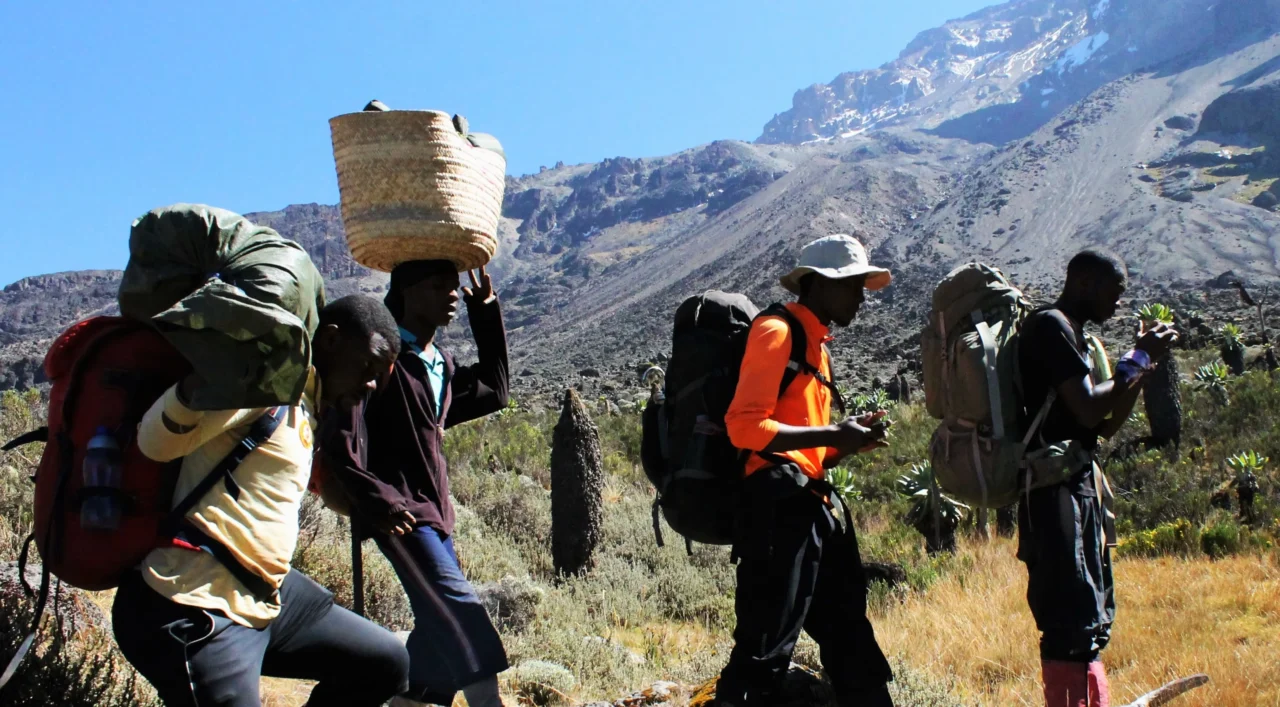
- Capture the Journey: Photograph your fellow climbers, your guides, the camp life, the changing vegetation zones, and the physical effort involved. These images tell a powerful story.
- Look for Details: Don’t just shoot wide vistas. Focus on small details like frost patterns, unique rock formations, or the texture of ice.
- Wait for Light: The ‘golden hours’ (shortly after sunrise and before sunset) offer the most beautiful light, even at high altitudes.
Mistake 6: Forgetting the Human Element
Kilimanjaro is as much about the people as it is about the mountain. Many photos focus solely on the scenery, missing the incredible camaraderie and personal achievement.
The Fix:
- Portraits of Climbers: Capture candid shots of your group members, guides, and porters. Their expressions and interactions are a vital part of the story.
- Camp Life: Document the daily routines – setting up camp, preparing meals, resting. These images provide context and a sense of place.
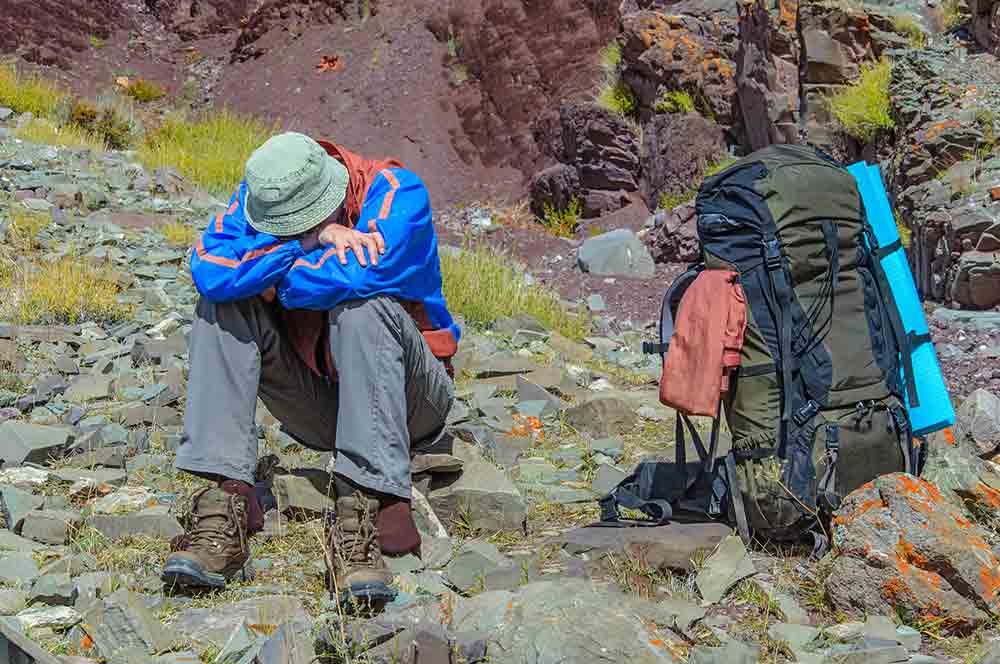
- The Effort: Show the physical exertion – the determined faces, the slow but steady progress, the shared support.
- Moments of Reflection: Capture the quiet moments of awe, exhaustion, and triumph.
Mistake 7: Not Acclimatizing Your Camera
Rapid temperature changes cause condensation, which is detrimental to electronics.
The Fix:
- Gradual Temperature Changes: When moving from a cold outdoor environment to a warm tent or lodge, keep your camera in its bag for at least 30-60 minutes to allow it to warm up slowly.
- Silica Gel Packs: Place a few silica gel packs inside your camera bag to absorb any moisture.
- Protect from Breath: When shooting in extreme cold, avoid breathing directly onto your lens or viewfinder, as your warm breath will cause instant fogging.
Mistake 8: Poor Tripod Use in Windy Conditions
Kilimanjaro is notorious for strong winds, especially near the summit. A tripod can easily become unstable, leading to blurred shots or even damage.
The Fix:
- Use the Tripod’s Hook: Most tripods have a hook on the center column. Hang your camera bag or a weight from it to increase stability.
- Low Center of Gravity: Extend the legs only as much as necessary and keep the center column as low as possible.
- Weighting the Tripod: Use rocks or your backpack to add weight to the tripod legs.
- Remote Shutter Release: Use a remote or the camera’s self-timer to avoid touching the camera and tripod during exposure.
- Wind-Resistant Shooting: If winds are extreme, consider hand-holding with image stabilization or increasing ISO and shutter speed rather than risking a tripod shot.
Mistake 9: Missing the Sunrise/Sunset Opportunities
The summit push often happens in darkness, meaning photographers miss the magical light of dawn. Similarly, sunset can be missed due to early camp setup.
The Fix:
- Plan Your Photography Schedule: For 2026-2027 climbs, discuss photography goals with your guide. They can help position you for the best light.
- Pre-Dawn Summit Push Photography: Use a headlamp and a fast lens. Focus on silhouettes, the stars, and the headlamps of fellow climbers. As dawn breaks, be ready to capture the changing colors.
- Golden Hour Shots: Make an effort to be out with your camera during the hour after sunrise and the hour before sunset. These are prime times for dramatic lighting and colors.
- Capture the Journey’s Light: Even lower down the mountain, the light filtering through the forest or hitting the alpine moorland can be spectacular.
Mistake 10: Not Preparing for the Physical Demands on Your Photography
Being exhausted, cold, and out of breath makes it hard to focus on composition or technical settings.
The Fix:
- Practice with Your Gear: Get used to operating your camera with gloves on. Practice changing settings, focus, and even lenses.
- Simplify Your Setup: A lighter, simpler kit is often better. Consider a good quality mirrorless camera or a compact DSLR with a versatile zoom lens.
- Pre-Set Customizations: Set up custom buttons or memory recalls on your camera for quick access to preferred settings (e.g., a snow setting).
- Pacing: Take your time. Your guides will encourage a slow and steady pace, which also benefits photography. Stop, breathe, observe, and shoot.
Choosing the Right Gear for Kilimanjaro Photography (2026-2027 Focus)
The gear you bring can make or break your Kilimanjaro photography experience. While the latest, most expensive equipment isn’t always necessary, choosing wisely for the specific conditions of Kilimanjaro is essential. For treks planned in 2026 and 2027, consider these recommendations:
Camera Body: Mirrorless vs. DSLR
Both mirrorless and DSLR cameras can be used effectively. However, mirrorless cameras often have advantages at altitude:
- Lighter Weight: Crucial for long treks.
- Electronic Viewfinder (EVF): Can be more useful in extreme cold as it’s less prone to fogging than an optical viewfinder. It also provides real-time exposure previews.
- Battery Consumption: While batteries drain faster in the cold for both, some mirrorless models are more power-efficient in moderate conditions.
DSLRs often have better battery life in general (though this is significantly reduced by cold) and a wider range of lens options, especially older, more affordable ones.
Lenses: Versatility is Key
Carrying multiple heavy lenses up Kilimanjaro is impractical. Aim for versatility:
- All-in-One Zoom: A lens like a 24-105mm f/4 or 24-70mm f/2.8 is incredibly useful. It covers wide-angle landscapes and moderate telephoto reach for portraits or distant details.
- Wide-Angle Prime: If you prefer prime lenses, a wide-angle (e.g., 24mm or 35mm equivalent) can be excellent for dramatic landscapes, especially in low light.
- Avoid Extreme Zooms: Super-telephoto or ultra-wide lenses are usually too specialized and heavy for this trek.
- Fast Apertures: Lenses with wider maximum apertures (e.g., f/2.8 or f/1.8) are better in low light, but often heavier and more expensive.
Essential Accessories for 2026-2027 Climbs
These are often overlooked but are critical:
- Camera Bag: A comfortable, weather-resistant backpack or sling bag. Consider one with good padding and quick access. A well-fitting backpack is paramount for comfort on a multi-day trek.
- Memory Cards: Bring more than you think you’ll need. SD cards are standard. Ensure they are fast enough for your camera.
- Filters: A polarizing filter can help reduce glare and enhance sky colors, but it can also reduce light transmission, which is less ideal in low-light conditions. A UV filter can protect your lens but offers no real photographic benefit.
- Cleaning Supplies: Rocket blower, microfiber cloths, lens cleaning solution.
- Power Bank: A high-capacity power bank can recharge camera batteries (if your charger allows it) or other small electronics, though it will also be affected by the cold.
Clothing for Your Camera
Think of your camera gear needing insulation too:
- Camera Parka/Insulated Cover: These are essentially padded covers that help maintain camera temperature.
- Hand Warmers: Chemical hand warmers can be placed inside the camera bag or even in a pocket next to batteries.
Best Times for Kilimanjaro Photography in 2026-2027
While photography is possible year-round, certain periods offer better conditions for clear skies and optimal light. Planning your climb around these times can enhance your photographic opportunities.
- Dry Seasons (January-March and June-October): These are generally the best times for Kilimanjaro photography. Skies are clearer, and the risk of prolonged rain or snow is lower.
- Sunrise and Sunset: The early morning summit push is often in the dark, but as dawn breaks, the light is spectacular. Sunset can also provide beautiful hues, though you’ll likely be in camp by then.
- Full Moon Climbs: Climbing during a full moon can offer surreal, moonlit landscapes, though it’s extremely cold. It also means less need for a headlamp on some sections.
Consider that even in the dry season, weather can be unpredictable. Always be prepared for a range of conditions.
Capturing the Iconic Kilimanjaro Summit Sunrise
The sunrise from Stella Point or Uhuru Peak is arguably the most sought-after photographic moment on Kilimanjaro. It often occurs during the coldest part of the summit night (between 3 AM and 6 AM).
Preparing for the Summit Sunrise Shoot
- Pre-Dawn Darkness: Your initial shots will be in near-total darkness. Use your headlamp and focus on silhouettes of climbers, the stars, and the faint glow on the horizon.
- Gear Accessibility: Have your camera ready in an easily accessible pocket or on a chest harness. Cold fingers fumbling in a backpack will cost you precious minutes and warmth.
- Battery Management: Ensure your primary camera battery is fully charged and warm. Have a warm spare ready.
- Tripod or Stabilization: A tripod is difficult to use in the dark, windy conditions. If you must use one, ensure it’s robust and weighted. Alternatively, brace your camera against a rock or use a monopod if you have one. Image stabilization in lenses or camera bodies is a huge advantage here.
- Exposure Settings: As the light changes, you’ll need to adjust quickly. Start with high ISO and wide aperture. As light increases, you can lower ISO and adjust aperture/shutter speed.
What to Photograph During Sunrise
- Silhouettes: Climbers against the pre-dawn sky.
- The Horizon: The first hints of color as the sun begins to rise.
- Clouds Below: If you’re above the cloud layer, the view of clouds stretching out below you is incredible.
- The Glaciers: The iconic Kilimanjaro glaciers, illuminated by the rising sun.
- The Summit Sign: A classic shot, but often crowded. Be patient or go early/late.
Photography on Different Kilimanjaro Routes
Each route on Kilimanjaro offers unique photographic potential, and understanding these differences can help you prepare your gear and expectations.
Machame Route (Whiskey Route)
Known for its scenic beauty and gradual ascent, Machame offers diverse photographic opportunities. The \”Shira Plateau\” offers stunning vistas, and \”Barranco Wall\” provides dramatic cliff-face shots. The \”Karanga Valley\” and \”Kibo \” \” \” \” \” \” \” \” \” \” \” \” \” \” \” \” \” \” \” \” \” \” \” \” \” \” \” \” \” \” \” \” \” \” \” \” \” \” \” \” \” \” \” \” \” \” \” \” \” \” \” \” \” \” \” \” \” \” \” \” \” \” \” \” \” \” \” \” \” \” \” \” \” \” \” \” \” \” \” \” \” \” \” \” \” \” \” \” \” \” \” \” \” \” \” \” \” \” \” \” \” \” \” \” \” \” \” \” \” \” \” \” \” \” \” \” \” \” \” \” \” \” \” \” \” \” \” \” \” \” \” \” \” \” \” \” \” \” \” \” \” \” \” \” \” \” \” \” \” \” \” \” \” \” \” \” \” \” \” \” \” \” \” \” \” \” \” \” \” \” \” \” \” \” \” \” \” \” \” \” \” \” \” \” \” \” \” \” \” \” \” \” \” \” \” \” \” \” \” \” \” \” \” \” \” \” \” \” \” \” \” \” \” \” \” \” \” \” \” \” \” \” \” \” \” \” \” \” \” \” \” \” \” \” \” \” \” \” \” \” \” \” \” \” \” \” \” \” \” \” \” \” \” \” \” \” \” \” \” \” \” \” \” \” \” \” \” \” \” \” \” \” \” \” \” \” \” \” \” \” \” \” \” \” \” \” \” \” \” \” \” \” \” \” \” \” \” \” \” \” \” \” \” \” \” \” \” \” \” \” \” \” \” \” \” \” \” \” \” \” \” \” \” \” \” \” \” \” \” \” \” \” \” \” \” \” \” \” \” \” \” \” \” \” \” \” \” \” \” \” \” \” \” \” \” \” \” \” \” \” \” \” \” \” \” \” \” \” \” \” \” \” \” \” \” \” \” \” \” \” \” \” \” \” \” \” \” \” \” \” \” \” \” \” \” \” \” \” \” \” \” \” \” \” \” \” \” \” \” \” \” \” \” \” \” \” \” \” \” \” \” \” \” \” \” \” \” \” \” \” \” \” \” \” \” \” \” \” \” \” \” \” \” \” \” \” \” \” \” \” \” \” \” \” \” \” \” \” \” \” \” \” \” \” \” \” \” \” \” \” \” \” \” \” \” \” \” \” \” \” \” \” \” \” \” \” \” \” \” \” \” \” \” \” \” \” \” \” \” \” \” \” \” \” \” \” \” \” \” \” \” \” \” \” \” \” \” \” \” \” \” \” \” \” \” \” \” \” \” \” \” \” \” \” \” \” \” \” \” \” \” \” \” \” \” \” \” \” \” \” \” \” \” \” \” \” \” \” \” \” \” \” \” \” \” \” \” \” \” \” \” \” \” \” \” \” \” \” \” \” \” \” \” \” \” \” \” \” \” \” \” \” \” \” \” \” \” \” \” \” \” \” \” \” \” \” \” \” \” \” \” \” \” \” \” \” \” \” \” \” \” \” \” \” \” \” \” \” \” \” \” \” \” \” \” \” \” \” \” \” \” \” \” \” \” \” \” \” \” \” \” \” \” \” \” \” \” \” \” \” \” \” \” \” \” \” \” \” \” \” \” \” \” \” \” \” \” \” \” \” \” \” \” \” \” \” \” \” \” \” \” \” \” \” \” \” \” \” \” \” \” \” \” \” \” \” \” \” \” \” \” \” \” \” \” \” \” \” \” \” \” \” \” \” \” \” \” \” \” \” \” \” \” \” \” \” \” \” \” \” \” \” \” \” \” \” \” \” \” \” \” \” \” \” \” \” \” \” \” \” \” \” \” \” \” \” \” \” \” \” \” \” \” \” \” \” \” \” \” \” \” \” \” \” \” \” \” \” \” \” \” \” \” \” \” \” \” \” \” \” \” \” \” \” \” \” \” \” \” \” \” \” \” \” \” \” \” \” \” \” \” \” \” \” \” \” \” \” \” \” \” \” \” \” \” \” \” \” \” \” \” \” \” \” \” \” \” \” \” \” \” \” \” \” \” \” \” \” \” \” \” \” \” \” \” \” \” \” \” \” \” \” \” \” \” \” \” \” \” \” \” \” \” \” \” \” \” \” \” \” \” \” \” \” \” \” \” \” \” \” \” \” \” \” \” \” \” \” \” \” \” \” \” \” \” \” \” \” \” \” \” \” \” \” \” \” \” \” \” \” \” \” \” \” \” \” \” \” \” \” \” \” \” \” \” \” \” \” \” \” \” \” \” \” \” \” \” \” \” \” \” \” \” \” \” \” \” \” \” \” \” \” \” \” \” \” \” \” \” \” \” \” \” \” \” \” \” \” \” \” \” \” \” \” \” \” \” \” \” \” \” \” \” \” \” \” \” \” \” \” \” \” \” \” \” \” \” \” \” \” \” \” \” \” \” \” \” \” \” \” \” \” \” \” \” \” \” \” \” \” \” \” \” \” \” \” \” \” \” \” \” \” \” \” \” \” \” \” \” \” \” \” \” \” \” \” \” \” \” \” \” \” \” \” \” \” \” \” \” \” \” \” \” \” \” \” \” \” \” \” \” \” \” \” \” \” \” \” \” \” \” \” \” \” \” \” \” \” \” \” \” \” \” \” \” \” \” \” \” \” \” \” \” \” \” \” \” \” \” \” \” \” \” \” \” \” \” \” \” \” \” \” \” \” \” \” \” \” \” \” \” \” \” \” \” \” \” \” \” \” \” \” \” \” \” \” \” \” \” \” \” \” \” \” \” \” \” \” \” \” \” \” \” \” \” \” \” \” \” \” \” \” \” \” \” \” \” \” \” \” \” \” \” \” \” \” \” \” \” \” \” \” \” \” \” \” \” \” \” \” \” \” \” \” \” \” \” \” \” \” \” \” \” \” \” \” \” \” \” \” \” \” \” \” \” \” \” \” \” \” \” \” \” \” \” \” \” \” \” \” \” \” \” \” \” \” \” \” \” \” \” \” \” \” \” \” \” \” \” \” \” \” \” \” \” \” \” \” \” \” \” \” \” \” \” \” \” \” \” \” \” \” \” \” \” \” \” \” \” \” \” \” \” \” \” \” \” \” \” \” \” \” \” \” \” \” \” \” \” \” \” \” \” \” \” \” \” \” \” \” \” \” \” \” \” \” \” \” \” \” \” \” \” \” \” \” \” \” \” \” \” \” \” \” \” \” \” \” \” \” \” \” \” \” \” \” \” \” \” \” \” \” \” \” \” \” \” \” \” \” \” \” \” \” \” \” \” \” \” \” \” \” \” \” \” \” \” \” \” \” \” \” \” \” \” \” \” \” \” \” \” \” \” \” \” \” \” \” \” \” \” \” \” \” \” \” \” \” \” \” \” \” \” \” \” \” \” \” \” \” \” \” \” \” \” \” \” \” \” \” \” \” \” \” \” \” \” \” \” \” \” \” \” \” \” \” \” \” \” \” \” \” \” \” \” \” \” \” \” \” \” \” \” \” \” \” \” \” \” \” \” \” \” \” \” \” \” \” \” \” \” \” \” \” \” \” \” \” \” \” \” \” \” \” \” \” \” \” \” \” \” \” \” \” \” \” \” \” \” \” \” \” \” \” \” \” \” \” \” \” \” \” \” \” \” \” \” \” \” \” \” \” \” \” \” \” \” \” \” \” \” \” \” \” \” \” \” \” \” \” \” \” \” \” \” \” \” \” \” \” \” \” \” \” \” \” \” \” \” \” \” \” \” \” \” \” \” \” \” \” \” \” \” \” \” \” \” \” \” \” \” \” \” \” \” \” \” \” \” \” \” \” \” \” \” \” \” \” \” \” \” \” \” \” \” \” \” \” \” \” \” \” \” \” \” \” \” \” \” \” \” \” \” \” \” \” \” \” \” \” \” \” \” \” \” \” \” \” \” \” \” \” \” \” \” \” \” \” \” \” \” \” \” \” \” \” \” \” \” \” \” \” \” \” \” \” \” \” \” \” \” \” \” \” \” \” \” \” \” \” \” \” \” \” \” \” \” \” \” \” \” \” \” \” \” \” \” \” \” \” \” \” \” \” \” \” \” \” \” \” \” \” \” \” \” \” \” \” \” \” \” \” \” \” \” \” \” \” \” \” \” \” \” \” \” \” \” \” \” \” \” \” \” \” \” \” \” \” \” \” \” \” \” \” \” \” \” \” \” \” \” \” \” \” \” \” \” \” \” \” \” \” \” \” \” \” \” \” \” \” \” \” \” \” \” \” \” \” \” \” \” \” \” \” \” \” \” \” \” \” \” \” \” \” \” \” \” \” \” \” \” \” \” \” \” \” \” \” \” \” \” \” \” \” \” \” \” \” \” \” \” \” \” \” \” \” \” \” \” \” \” \” \” \” \” \” \” \” \” \” \” \” \” \” \” \” \” \” \” \” \” \” \” \” \” \” \” \” \” \” \” \” \” \” \” \” \” \” \” \” \” \” \” \” \” \” \” \” \” \” \” \” \” \” \” \” \” \” \” \” \” \” \” \” \” \” \” \” \” \” \” \” \” \” \” \” \” \” \” \” \” \” \” \” \” \” \” \” \” \” \” \” \” \” \” \” \” \” \” \” \” \” \” \” \” \” \” \” \” \” \” \” \” \” \” \” \” \” \” \” \” \” \” \” \” \” \” \” \” \” \” \” \” \” \” \” \” \” \” \” \” \” \” \” \” \” \” \” \” \” \” \” \” \” \” \” \” \” \” \” \” \” \” \” \” \” \” \” \” \” \” \” \” \” \” \” \” \” \” \” \” \” \” \” \” \” \” \” \” \” \” \” \” \” \” \” \” \” \” \” \” \” \” \” \” \” \” \” \” \” \” \” \” \” \” \” \” \” \” \” \” \” \” \” \” \” \” \” \” \” \” \” \” \” \” \” \” \” \” \” \” \” \” \” \” \” \” \” \” \” \” \” \” \” \” \” \” \” \” \” \” \” \” \” \” \” \” \” \” \” \” \” \” \” \” \” \” \” \” \” \” \” \” \” \” \” \” \” \” \” \” \” \” \” \” \” \” \” \” \” \” \” \” \” \” \” \” \” \” \” \” \” \” \” \” \” \” \” \” \” \” \” \” \” \” \” \” \” \” \” \” \” \” \” \” \” \” \” \” \” \” \” \” \” \” \” \” \” \” \” \” \” \” \” \” \” \” \” \” \” \” \” \” \” \” \” \” \” \” \” \” \” \” \” \” \” \” \” \” \” \” \” \” \” \” \” \” \” \” \” \” \” \” \” \” \” \” \” \” \” \” \” \” \” \” \” \” \” \” \” \” \” \” \” \” \” \” \” \” \” \” \” \” \” \” \” \” \” \” \” \” \” \” \” \” \” \” \” \” \” \” \” \” \” \” \” \” \” \” \” \” \” \” \” \” \” \” \” \” \” \” \” \” \” \” \” \” \” \” \” \” \” \” \” \” \” \” \” \” \” \” \” \” \” \” \” \” \” \” \” \” \” \” \” \” \” \” \” \” \” \” \” \” \” \” \” \” \” \” \” \” \” \” \” \” \” \” \” \” \” \” \” \” \” \” \” \” \” \” \” \” \” \” \” \” \” \” \” \” \” \” \” \” \” \” \” \” \” \” \” \” \” \” \” \” \” \” \” \” \” \” \” \” \” \” \” \” \” \” \” \” \” \” \” \” \” \” \” \” \” \” \” \” \” \” \” \” \” \” \” \” \” \” \” \” \” \” \” \” \” \” \” \” \” \” \” \”
Check Availability for Kilimanjaro Photography Mistakes At High Altitude 2026-2027
Ready to compare dates, prices, and the best option for your group? Send the package name and travel month so the team can reply with a clear quote, availability, and what is included.
Kilimanjaro Glacier Photography Expedition: Capture Icy Wonders In 2026-2027
start a unique Kilimanjaro Glacier Photography Expedition, capturing the majestic, receding ice formations of Africa's highest peak. This guide covers the best times, routes, gear, and tips...
View package details
Kilimanjaro Group-Climb Mistakes: Avoid Common Pitfalls For A Successful
This guide details common Kilimanjaro group-climb mistakes, offering practical advice for trekkers aiming for a successful summit. Learn about preparation, acclimatization, gear, and...
View package details
Kilimanjaro Food And Nutrition Mistakes: Avoid These To Summit Successfully
Proper nutrition is crucial for a successful Kilimanjaro climb. This guide details common food and nutrition mistakes climbers make, offering expert advice on what to eat, when to eat it...
View package details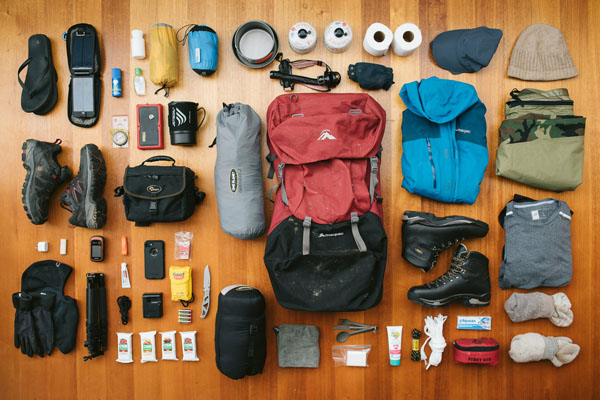
Kilimanjaro Gear-Rental Mistakes To Avoid For Your Climb 2026-2027
Planning a Kilimanjaro climb for 2026 or 2027? Renting gear can save money and hassle, but mistakes are common. This guide details the most frequent errors climbers make when renting...
View package details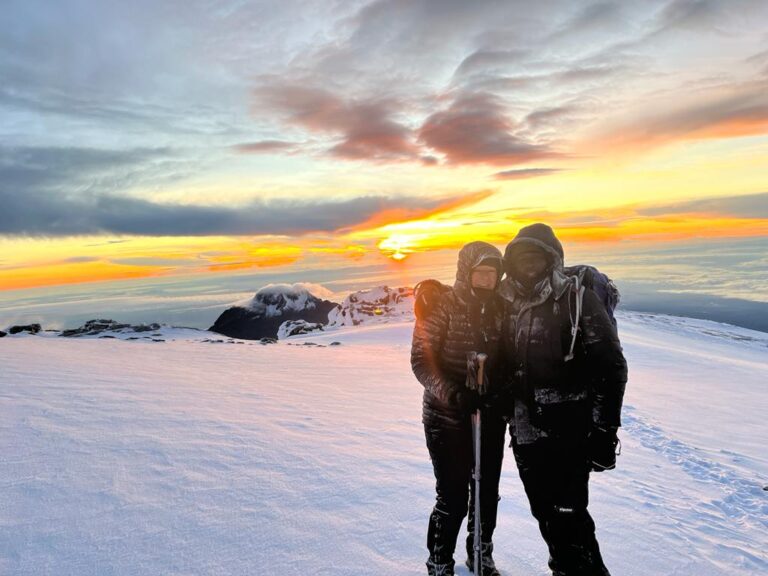
Kilimanjaro Hotel Booking Mistakes: Avoid These Pitfalls For A Smooth Climb
Booking accommodation near Kilimanjaro is crucial for a successful climb. This guide details common Kilimanjaro hotel booking mistakes to help you avoid them, ensuring comfort and readiness...
View package details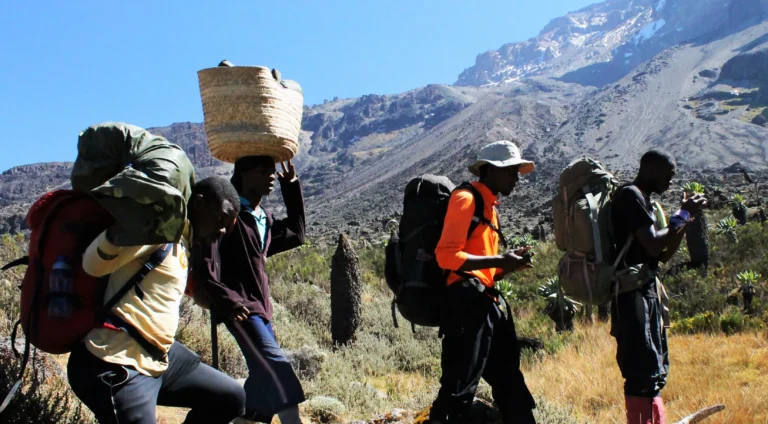
Kilimanjaro Flight-Booking Mistakes: Avoid These Pitfalls For Your Climb
Planning your Kilimanjaro climb for 2026 or 2027? Don't let flight booking errors derail your adventure. This guide covers critical mistakes to avoid, from choosing the right airport and...
View package details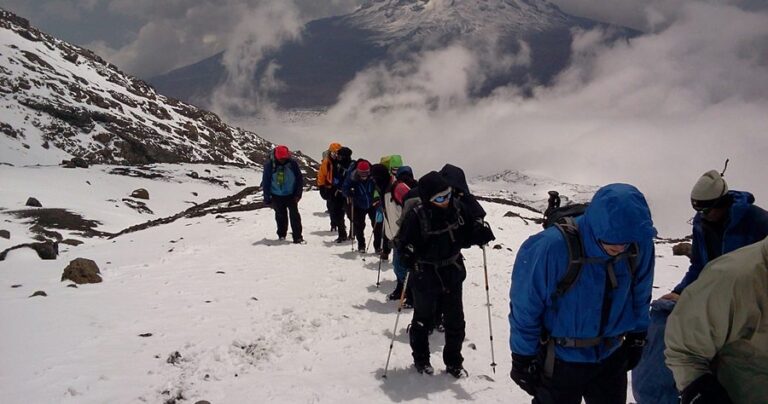
Kilimanjaro Tipping Mistakes And Etiquette: A Comprehensive Guide For Climbers
Navigating Kilimanjaro tipping can be confusing. This guide details common mistakes and proper etiquette for tipping your support crew, ensuring fair compensation and a positive experience...
View package details
Kilimanjaro Insurance Mistakes To Avoid For A Safe Climb In 2026-2027
Climbing Mount Kilimanjaro is a dream for many, but overlooking proper insurance can turn an incredible adventure into a costly disaster. This guide details the most common Kilimanjaro...
View package details
Kilimanjaro Route-Selection Mistakes 2026-2027
Kilimanjaro Route-Selection Mistakes is explained with current 2026-2027 planning, price, itinerary and booking information.
View package details
Kilimanjaro Layering Mistakes That Leave Climbers Cold: Expert Guide 2026-2027
Discover the common Kilimanjaro layering mistakes that can lead to discomfort and hypothermia. This guide provides essential tips on choosing the right gear and layering system to ensure...
View package details
Kilimanjaro Footwear Mistakes And Blister Prevention 2026-2027
Kilimanjaro Footwear Mistakes and Blister Prevention is explained with current 2026-2027 planning, price, itinerary and booking information.
View package details
Kilimanjaro Packing Mistakes To Avoid For A Successful Climb In 2026-2027
Packing for Kilimanjaro is crucial for a successful trek. This guide details common packing mistakes to avoid, ensuring you have the right gear for the varying altitudes and conditions...
View package detailsNo related package matches those filters. Clear one or more filters to see the other topic-matched options.